
Hey there, fellow jigsaw enthusiasts and DIY lovers! It’s great to have you here today, as I’m about to share my expertise and passion for cutting porcelain tile using a jigsaw. As someone who’s spent countless hours working on various DIY projects, I can’t emphasize enough the importance of accurately cutting porcelain tile for that seamless and professional finish we all strive for.
Now, you might be wondering, “A jigsaw for cutting porcelain tile? Really?” Well, believe it or not, a jigsaw can be an incredibly versatile and efficient tool for this task when used correctly. It’s not just for cutting wood or metal; with the right blade and techniques, a jigsaw can truly shine when it comes to working with porcelain tiles.
So, grab your favorite beverage, and let’s embark on this exciting journey together. I’ll guide you through the ins and outs of cutting porcelain tile with a jigsaw, sharing my personal tips and tricks I’ve gathered throughout my years of experience. Let’s dive in and unlock the true potential of your trusty jigsaw!
Key takeaways
| Key Takeaways |
|---|
| Choose a jigsaw with variable speed control and a reliable motor, and use a diamond or carbide-grit blade designed for hard materials like porcelain tile. |
| Measure and mark the tile, secure it to prevent movement, and maintain a clean and safe workspace before cutting. |
| Start with a pilot hole, use a low jigsaw speed, and apply gentle pressure while cutting along the marked line for a clean and precise cut. |
| After cutting, smooth the edge with a rubbing stone or fine-grit sandpaper and clean the tile surface with a damp cloth to achieve a polished finish. |
| Prioritize safety by wearing appropriate PPE, inspecting your tools, maintaining a stable grip, using a GFCI outlet, and staying focused while taking breaks when needed. |
Choosing the Right Jigsaw and Blade
To achieve the best results and make your project a success, you need to equip yourself with the right jigsaw and blade. Trust me, having the proper tools can make all the difference in the world when cutting porcelain tiles.
When selecting a jigsaw, I recommend looking for one with variable speed control, which will allow you to adjust the cutting speed according to the material you’re working with. Additionally, a reliable motor is crucial for tackling tough materials like porcelain. In my experience, corded jigsaws tend to offer more power and consistent performance, making them an excellent choice for this type of project.
Now, let’s talk about the real star of the show – the blades. A regular wood or metal blade just won’t cut it (pun intended) for porcelain tile. Instead, you’ll want to opt for a diamond or carbide-grit jigsaw blade, specifically designed for cutting through hard materials like a hot knife through butter. My personal favorite, and one that has never let me down, is the Bosch T130DG Diamond Grit Blade. This beauty has transformed the way I approach cutting porcelain tiles, and I’m sure you’ll love it too!
By investing in a quality jigsaw and the right blade, you’ll set yourself up for success and make cutting porcelain tile a breeze. And as always, remember that practice makes perfect, so don’t be afraid to experiment and find the combination that works best for you.
Preparing the Porcelain Tile and Workspace
A well-prepared workspace and tile are essential for a smooth, stress-free cutting experience. Trust me, I’ve learned this the hard way! So, let’s make sure everything is set up just right before we start cutting.
First, measure and mark your tile with precision. Use a straight edge or a ruler to ensure your lines are clean and straight. A non-permanent marker works best for marking the tile, as it can be easily wiped off once you’re done cutting. This will give you a clear guideline to follow during the cut, helping you achieve that perfect, professional finish.
To prevent movement and potential accidents, it’s crucial to secure the tile properly. I suggest using clamps or a non-slip mat on your workbench to hold the tile steady. Remember, a stable tile not only makes cutting easier but also reduces the risk of chipping or cracking.
Lastly, take a moment to ensure you have a clean and safe workspace. Clear away any debris or clutter that might interfere with your cutting or cause accidents. Having a well-organized work area not only increases safety but also helps you stay focused and efficient throughout the project.
Remember, a little preparation goes a long way, and by following these steps, you’ll set yourself up for success when cutting porcelain tile with a jigsaw.
Cutting the Porcelain Tile with a Jigsaw
Now that we’ve prepped our tile and workspace, it’s time to put that jigsaw to work and start cutting our porcelain tile. With a little patience and the right technique, you’ll be a porcelain tile cutting pro in no time!
Begin by drilling a pilot hole near the edge of your marked line using a carbide or diamond-tipped drill bit. This hole will serve as the starting point for your jigsaw blade, making it easier to initiate the cut without causing any damage to the tile.
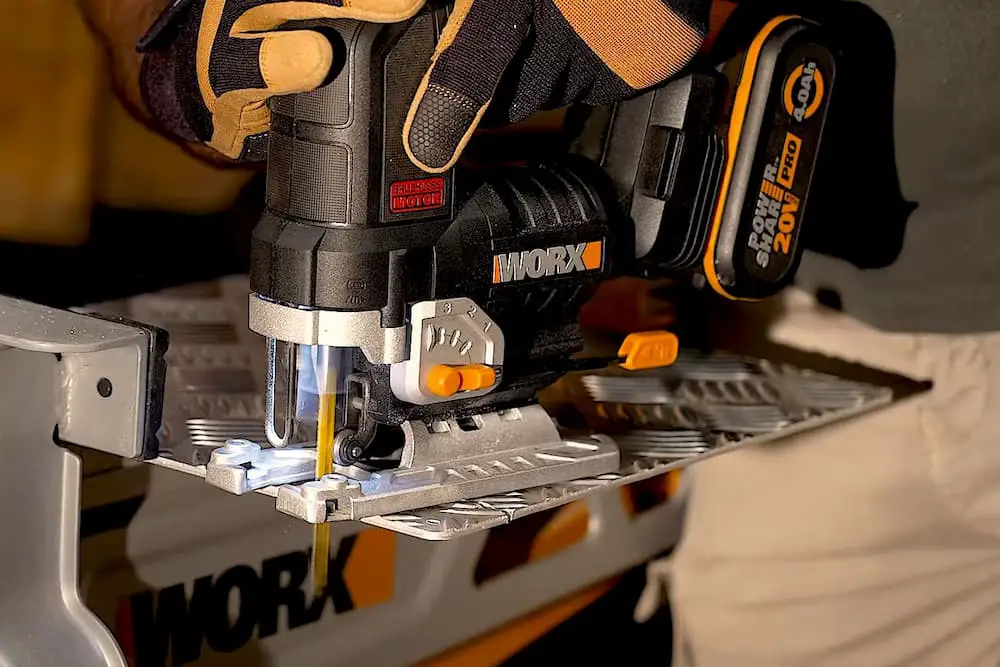
Next, set your jigsaw to a low speed – around 1 or 2 on the speed dial should be perfect. Higher speeds can cause the blade to overheat or the tile to chip, which is definitely not what we want. Remember, slow and steady wins the race here! Carefully insert the blade into the pilot hole and begin cutting along the marked line, applying gentle pressure as you guide the jigsaw.
I find it helpful to use a “plunge cut” technique when cutting porcelain tile. To do this, angle the jigsaw slightly to ease the blade into the tile before leveling it out. This allows for a smoother entry and reduces the risk of chipping or cracking.
Remember to let the blade do the work and don’t force it. Applying too much pressure can lead to mistakes or even break the tile. If you feel resistance, try adjusting your cutting angle or speed slightly to find the sweet spot.
By following these steps and practicing patience, you’ll be well on your way to mastering the art of cutting porcelain tile with a jigsaw.
Finishing and Cleaning the Cut Edge
Congratulations on making it through the cutting process! But before you start admiring your handiwork, there’s still a bit more to do. Finishing and cleaning the cut edge are essential steps to give your porcelain tile that polished, professional look.
Once you’ve completed the cut, you may notice some sharp or jagged areas along the edge. To address this, use a rubbing stone or fine-grit sandpaper to smooth out any imperfections gently. When using a rubbing stone, hold it at a slight angle and work along the edge in a back-and-forth motion. If you prefer sandpaper, wrap it around a sanding block for better control and even pressure. This step will give your tile a smooth, clean finish, which is not only visually appealing but also safer to handle.
After you’ve smoothed the edge, it’s time to clean the tile surface. Cutting porcelain tile can generate quite a bit of dust, so it’s essential to remove any residue to reveal the true beauty of your tile. Simply take a damp cloth and wipe down the surface, removing any lingering dust or debris. For stubborn spots or marks, a mild soap solution can be used, but be sure to rinse thoroughly with clean water afterward.
Taking the time to properly finish and clean your cut porcelain tile will not only enhance its appearance but also ensure the longevity and quality of your DIY project. So, go ahead and give your tile the final touches it deserves, and then step back and admire your handiwork!
Safety Tips for Cutting Porcelain Tile with a Jigsaw
Safety is crucial when using power tools like a jigsaw. Follow these tips to ensure a safe and enjoyable cutting experience:
- Wear appropriate Personal Protective Equipment (PPE) such as safety goggles, gloves, dust mask, and ear protection.
- Inspect your jigsaw and blade for the proper condition; ensure the blade is securely fastened, sharp, and undamaged.
- Maintain a stable grip on the jigsaw, holding it with both hands for accuracy and safety.
- Plug a corded jigsaw into a Ground Fault Circuit Interrupter (GFCI) outlet to prevent electrical shocks.
- Stay focused, and take breaks if you feel fatigued or lose concentration.
By following these safety tips, you’ll create a secure working environment and set yourself up for a successful porcelain tile cutting project. Stay safe and happy cutting!
Frequently Asked Questions
Can you cut porcelain tile with a jigsaw?
Yes, you can cut porcelain tile with a jigsaw, provided you use the appropriate blade, such as a diamond or carbide-grit blade, and follow the correct technique and safety precautions.
What alternative tool can I use to cut porcelain tile?
An alternative tool for cutting porcelain tile is a wet tile saw, which uses a water-cooled diamond blade for precise and clean cuts. Other options include a manual tile cutter, an angle grinder with a diamond blade, or a tile nipper for smaller cuts and adjustments.
Conclusion
Cutting porcelain tile with a jigsaw may seem daunting, but with the right tools and techniques, you can achieve clean, precise cuts for your DIY projects. By following the steps outlined in this post, you’ll be well on your way to mastering the art of cutting porcelain tile with a jigsaw.
Don’t be discouraged if your first few attempts aren’t perfect. With practice and experimentation, you’ll gain confidence and improve your skills. So, grab your trusty jigsaw, the right blade, and some porcelain tile, and start practicing!
Remember, the key to success is patience, the right tools, and a focus on safety. Whether you’re working on a kitchen backsplash, bathroom floor, or any other project involving porcelain tiles, your jigsaw can be an invaluable companion. Happy cutting, and let me know how your projects turn out!